reStructuredText Guide
Even though Sphinx provides a comprehensive reStructuredText Primer, I felt the documentation team needed a version tailored to our own syntax conventions and the specific standards we'd implemented for consistency.
Here is a sample RST Guide, similar to the one I created for High Fidelity.
What is RST?
(...and how do I use it?)
reStructuredText (RST) is the default plaintext markup language used by Sphinx. It is an extensible markup language, that is fully customizable. However, we don't (yet) have need of this, and will stick with the default set of directives for our documentation.
Since RST was designed to be a simple, unobtrusive markup language, you will catch on quickly.
When to use RST
Our documentation system is set up to accept either Markdown or reStructuredText syntax. You can only use 1! (meaning that you cannot use both Markdown and RST in the same page). They are not cross-compatible.
You're welcome to use RST anytime. But you are required to use it when:
- The page contains tables
- The page is a "parent" of another page (for example - a page called "Docs-as-Code Syntax" will likely be a parent page of "Markdown," "AsciiDoc," and "RestructuredText")
RST Syntax Guide
This section is a brief introduction to reStructuredText (RST) syntax. There are many sources of information about RST online if you can't find what you need here.
Basic Text Formatting
*italics*
**bold**
Result:
italics
bold
Headings
Ensure that the characters above and below the heading are a) the same length and b) extend beyond the length of the heading text.
#########################
h1
#########################

------------------------------------
h2
------------------------------------

^^^^^^^^^^^^^^^^^^^^^^^^^^
h3
^^^^^^^^^^^^^^^^^^^^^^^^^^

""""""""""""""""""""""""""""""""""""""""""""
h4 (use double quotation marks ")
""""""""""""""""""""""""""""""""""""""""""""
Result:
h1
h2
h3
h4 (use double quotation marks ")
Blockquotes
Blockquotes indent your paragraph and add a left border to separate it from other text on the page. Use blockquotes when you are quoting, paraphrasing, or summarizing from another source.
To insert a blockquote

    Simply indent the text, preceded by a blank line

        You can also nest blockquotes with additional indents
Result:
To insert a blockquote
Simply indent the text, preceded by a blank line
You can also nest blockquotes with additional indents
Unordered Lists
* This is a bulleted list.
* It has two items.
Result
- This is a bulleted list.
- It has two items.
Ordered Lists
#. This is a numbered list.
#. It has two items.
Result
- This is a numbered list.
- It has two items.
Nested Lists
* This is a bulleted list.
* It has three items

    * and a nested list
    * that also has two items.

* This is the third item.
Result
- This is a bulleted list.
- It has three items
- and a nested list
- that also has two items.
- This is the third item.
Inline Code
Enclose in `` on both sides.
Use the ``findObject()`` method to find an object.
Result: Use the findObject() method to find an object.
Code Block
Proceed code sample with :: ending the text prior to the sample, then a blank line, followed by indented code.
Since colors go from 0 to 255, we could do the following::

    var red = 0;
    function changeObjectColor(redValue){
        var objectColorProps = MyObject.getObjectProps(objID, [“color”]).color;
        objectColorProps.red = redValue;
        MyObject.editObject(objID, objectColorProps);
    }
Result: Since colors go from 0 to 255, we could do the following:
var red = 0;
function changeObjectColor(redValue){
    var objectColorProps = MyObject.getObjectProps(objID, [“color”]).color;
    objectColorProps.red = redValue;
    MyObject.editObject(objID, objectColorProps);
}
Images
You can customize the image and figure options from within the directive.
<!-- Example 1: This is a simple image without a caption or customization -->
.. image:: path_to_image.png

<!-- Example 2: Customize an image by adding one or more of the following properties -->
.. image:: path_to_image.png
    :class: border-img
    :height: 100px
    :width: 200px
    :scale: 50%
    :align: right
    :alt: alternate text

<!-- Example 3: A figure is an image with a caption -->
.. figure:: path_to_image.png

    Caption goes here.

<!-- Example 4: Customize a figure by adding one or more of the following properties -->
..figure:: path_to_image.png
    :figclass: border-img
    :figwidth: 300px
    :height: 100px
    :width: 200px
    :scale: 50%
    :align: right
    :alt: alternate text

    Caption goes here.

    Optionally, add a legend after the caption.
Results
- Example 1
- Example 2
- Example 3
- Example 4
A simple image without a caption or customization
.. image:: _images/pie-chart.png

A custom-sized, centered image with a CSS class and alternate text
.. image:: _images/pie-chart.png
    :class: border-img
    :height: 150px
    :width: 150px
    :align: center
    :alt: alternate text
A basic figure (image) with a caption
..figure:: _images/pie-chart.png

    What breeds are my dog?
A centered figure (image) with custom sizing, caption, legend, CSS class, and alt text
Note: Use :figclass: to configure the enclosing box, and :class: to configure the image itself.
.. figure:: _images/pie-chart.png
    :figclass: border-figure
    :figwidth: 300px
    :class: border-img
    :height: 200px
    :width: 200px
    :align: center
    :alt: alternate text

    What breeds are my dog?

    **Legend**

    * Red: Husky
    * Green: Malamute
    * Blue: Labrador
    * Yellow: Australian Shepherd
Result
Legend
- Red: Husky
- Green: Malamute
- Blue: Labrador
- Yellow: Australian Shepherd
Admonitions
.. note:: Text for note

.. warning:: Text for warning
Result:
Text for Note
Text for warning
External links
`Text to link < %url% >`_

<!-- Example -->
I want to create a link `here <https://google.com>`_ to Google.
Result: I want to create a link here to Google.
Internal links
Using this syntax, Sphinx automatically attempts to resolve relative links if they’re invalid.
:doc:`Text to link < %relative path% >`

<!-- Example -->
I want to create a link :doc:`here <index>` to my homepage.
Result: I want to create a link here to my homepage.
Anchor links (Same Page)
`Heading title`_

<!-- Example -->
I want to create a link to `What about HTML`_, which is at the bottom of this page.
Result: I want to create a link to What about HTML, which is at the bottom of this page.
Anchor links (Different Page)
Note the use of .html in the URL
`Text to link < %url% >`_

<!-- Example -->
I want to create a link to the `list of release note samples <./portfolio.html#release-notes>`_.
Result: I want to create a link here to the list of release note samples.
Tables
Use this link: Table Generator
I’m not kidding. Just use it. You will not regret it.
The RST table syntax is this, and everything has to be lined up perfectly.
+--+--+--+--+--+
|  |  |  |  |  |
+==+==+==+==+==+
|  |  |  |  |  |
+--+--+--+--+--+
|  |  |  |  |  |
+--+--+--+--+--+
|  |  |  |  |  |
+--+--+--+--+--+
Here's an example of a table that is filled in. Notice the use of RST within the table.
+---------------+------------------+
| Action        | Key              |
+===============+==================+
| Undo          | ``CTRL`` + ``Z`` |
+---------------+------------------+
| Redo          | ``CTRL`` + ``Y`` |
+---------------+------------------+
| Delete Entity | ``DEL``          |
+---------------+------------------+
Results
| Action | Key |
|---|---|
| Undo | CTRL + Z |
| Redo | CTRL + Y |
| Delete Entity | DEL |
Creating Table of Contents
Add a TOC going to other pages
When a page has children pages (i.e. "Docs-as-Code Syntax" is a parent of "Markdown," "AsciiDoc," and "reStructuredText"), the TOC is printed on the parent page as well as the TOC, as illustrated.
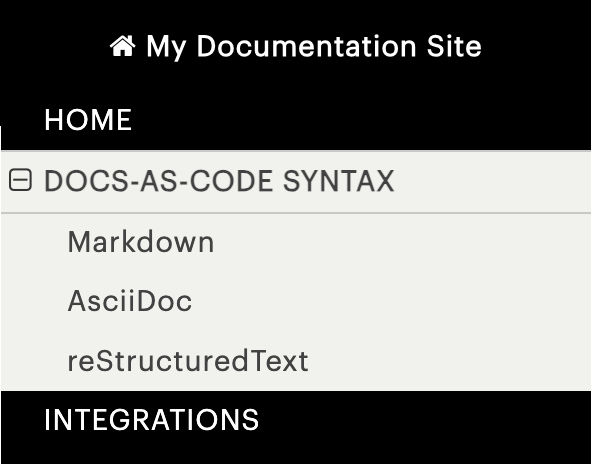
.. toctree::
:maxdepth: 2
:titlesonly:

Markdown \<syntax\/markdown\>
AsciiDoc \<syntax\/asciidoc\>
reStructuredText \<syntax\/rst\>
Add a TOC for headings in a page
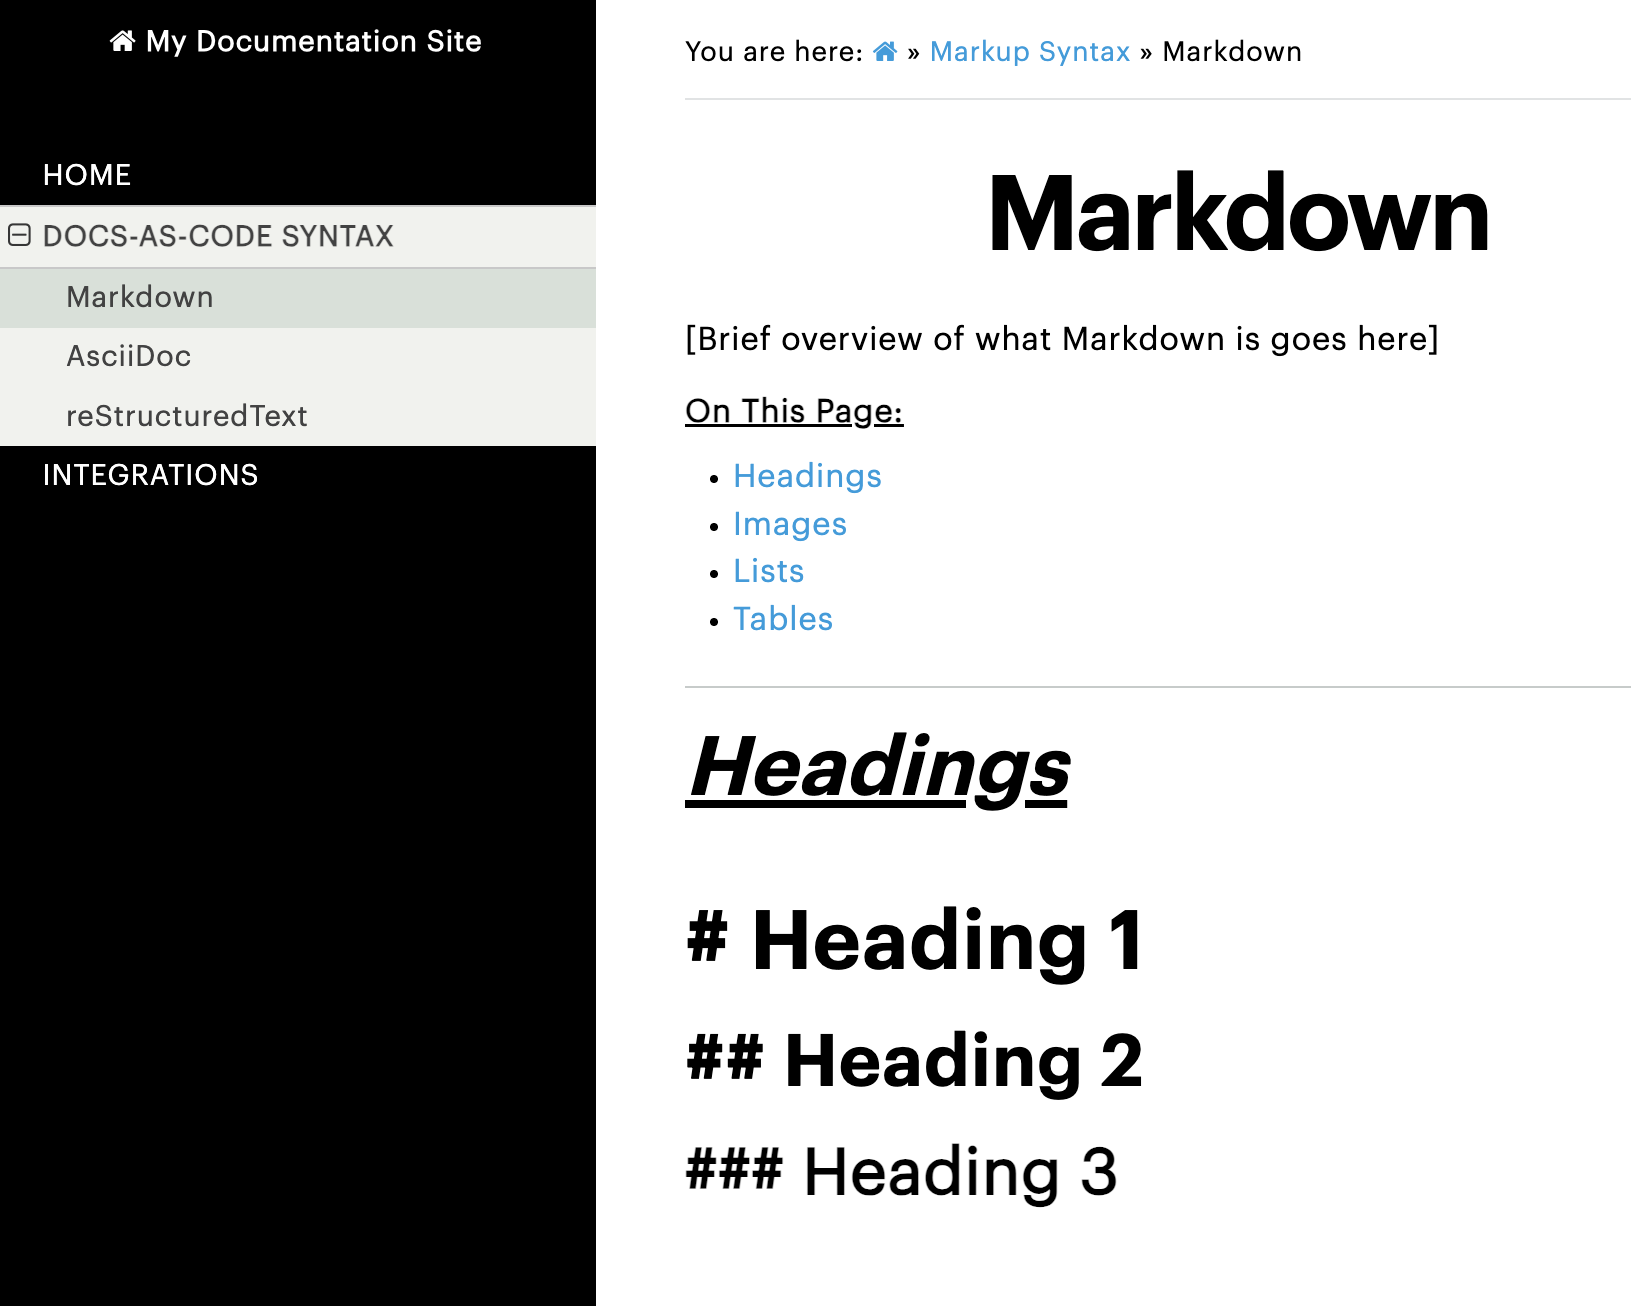
This is for the "On this page" section after a page's overview.
.. contents:: On This Page
:depth: 2
Using HTML within RST
RST supports the use of raw HTML code alongside any RST commands. Here are some situations where you might want to use raw HTML:
- Embedding third-party media with the
<iframe>tag - Using advanced layout designs that can't be accomplished with rst
- Adding JavaScript or custom web widgets
- Adding comments to the content using
<!-- comment goes here -->
To insert raw html:
.. raw:: html

    <!-- Insert custom card here -->
    <div class="custom-card">
        <h3>Interactive Feature</h3>
        <p>This content is rendered directly as HTML.</p>
    </div>
Note: Sphinx does NOT support the use of images in HTML (Sphinx will not automatically copy over the images to the built image folder, as it does with images added with rst). If you need to use images and raw HTML, you must end the HTML, add the image in RST, then restart the HTML segment as shown below:
.. raw:: html

    <table border="1" class="docutils">
    <thead>
    <tr>
    <th class="head" align="center">Dog Breeds</th>
    </tr>
    </thead>
    <tbody>
    <tr>
    <td>
    <!-- A white line, followed by unindented text ends the HTML segment -->

.. image:: _images/corgi.jpg
.. image:: _images/labrador.jpg

.. raw:: html

    <!-- Now we've started a new HTML segment to finish our HTML -->
    </td>
    </tr>
    </tbody>
    </table>
Back to Portfolio